

If you're a regular reader of Altered Artworks, then you know I love a good flea market. A few months ago, I found this magazine side table at the local Topanga Vintage Market.
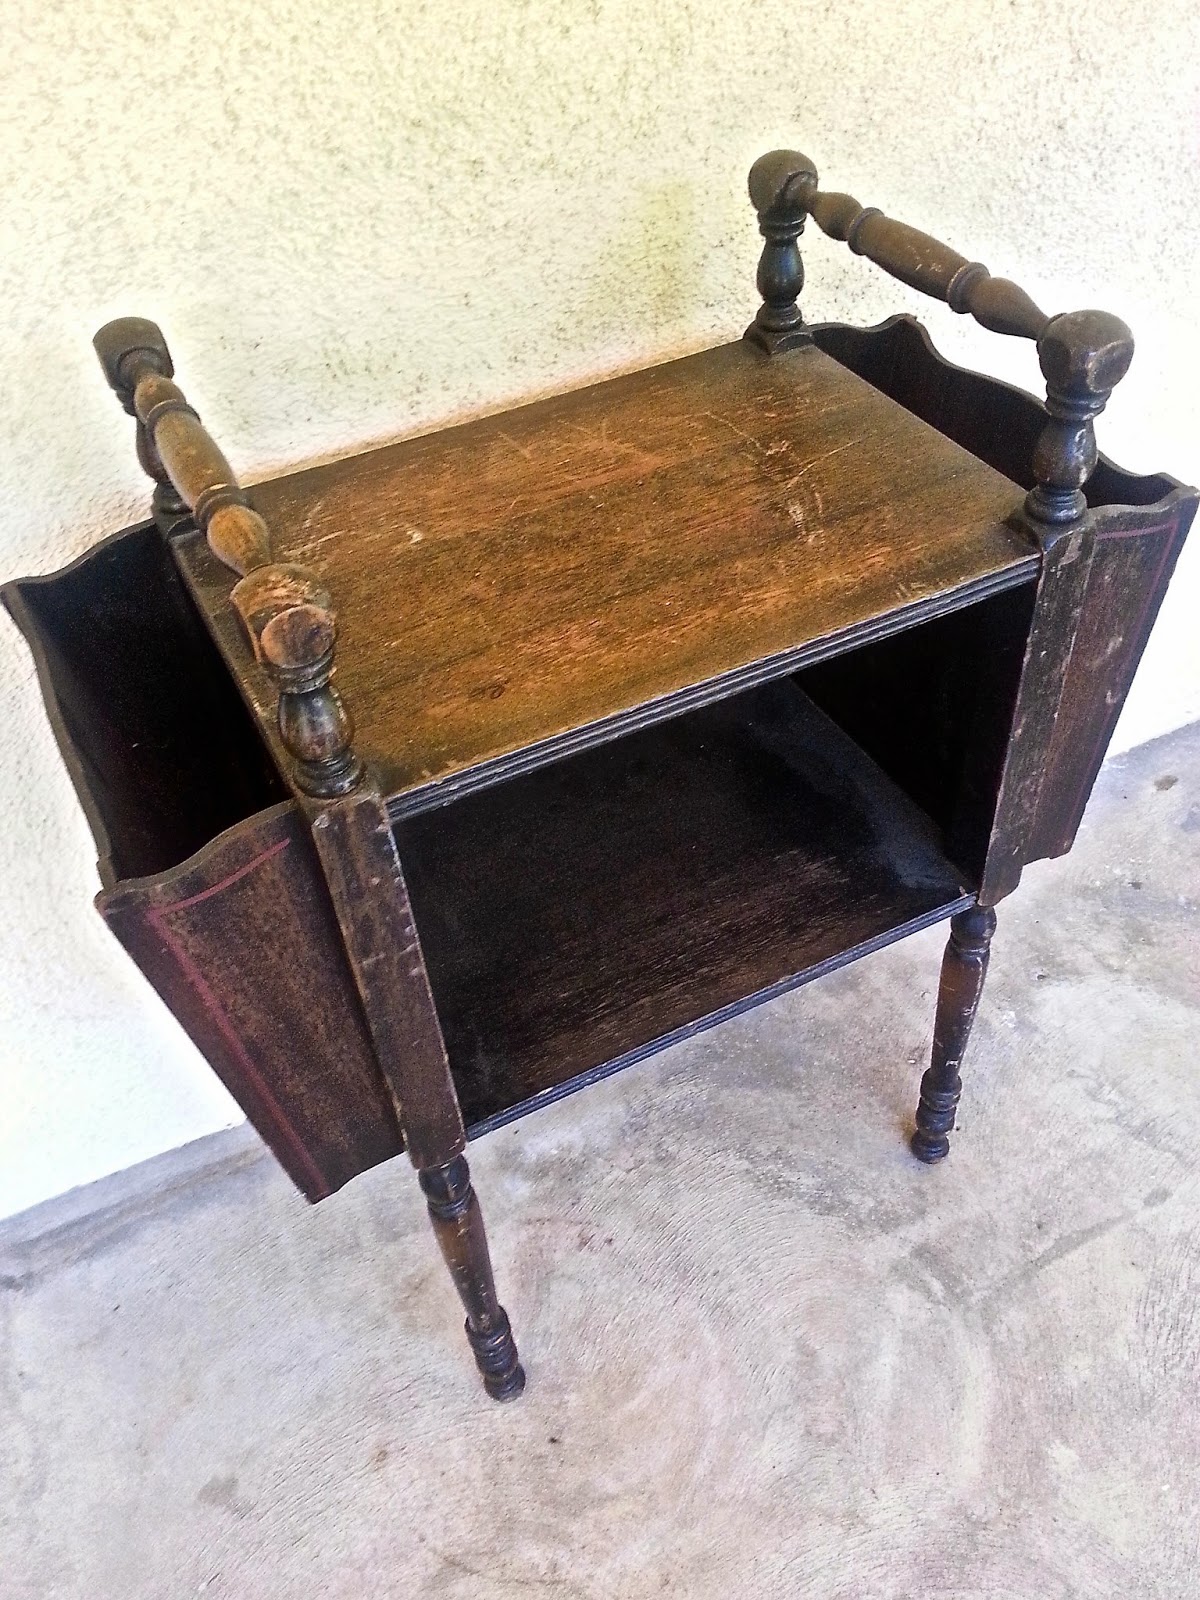
It had good bones but desperately needed a makeover.

I was finally inspired when DecoArt contacted me to join
their artist program and try their Americana Decor Chalky Finish Paint.
They have a good selection of colors and finishes.

First, I thoroughly wiped down the table with a damp cloth. That's all the prep you need with this paint. Its chalky consistency easily adheres and covers most surfaces.


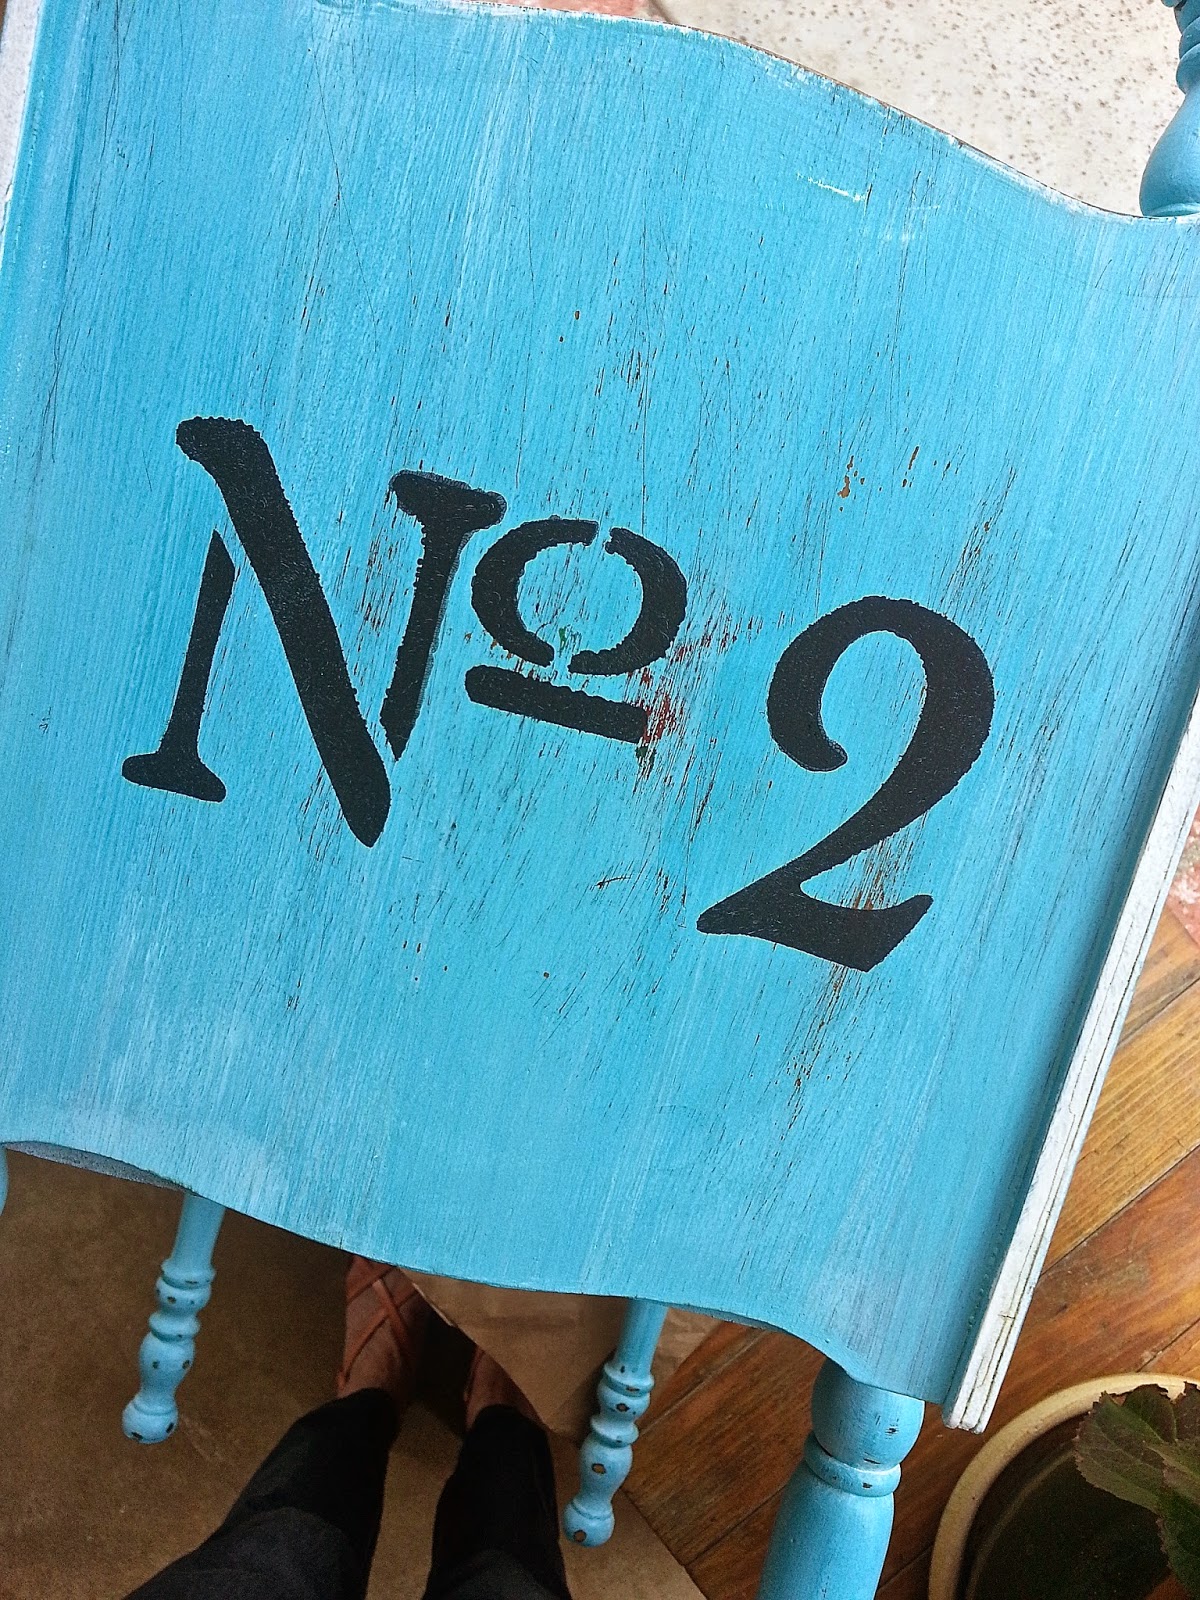
DecoArt makes beautiful vinyl stencils. The Americana Decor stencil line is one of my favorites, as I love their vintage look. I chose both the Cafe Paris and Old World Numbers for this project.

After taping down the stencil so it stays in place, I used a stencil brush, and lightly dabbed the paint in an up and down motion, completely covering the stencil design. I used the color, "Carbon" for the designs.
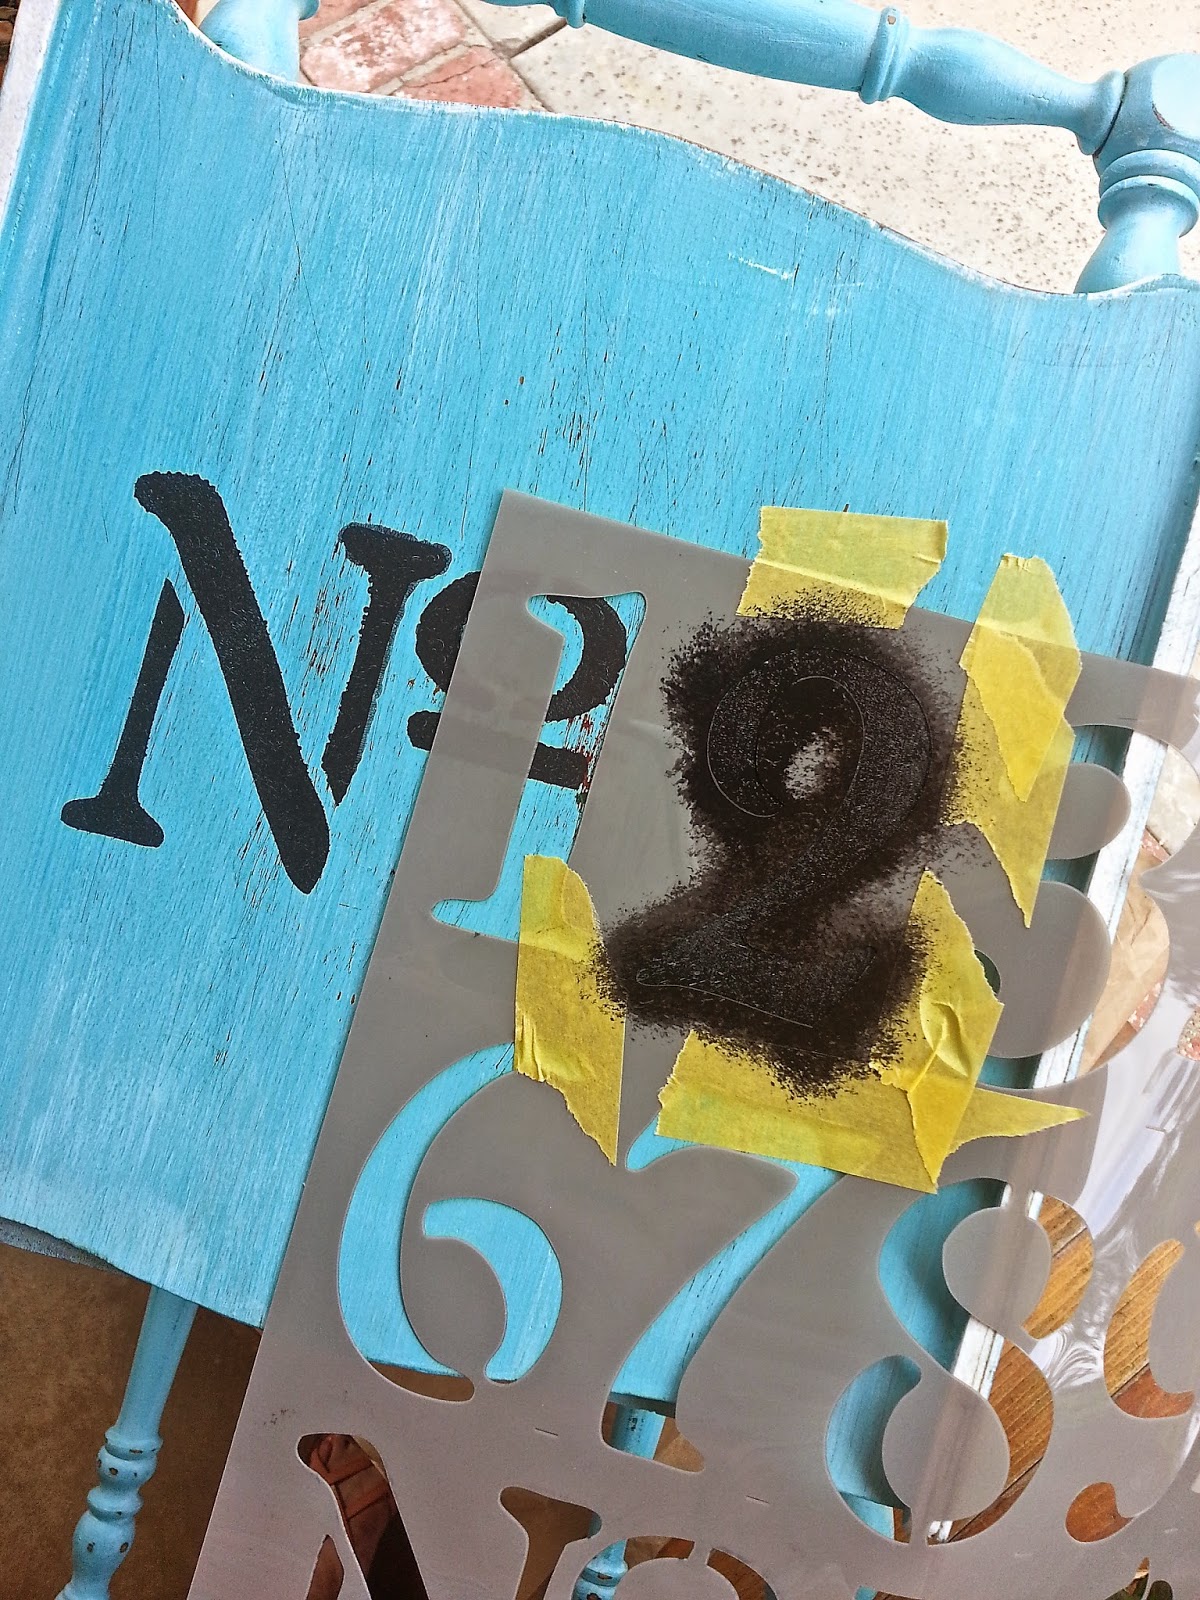
S-l-o-w-l-y, carefully lift the stencil to see your image.
Just wash and gently rub the stencils under water to clean them to use over and over again.
I again lightly sanded the images to further distress the table.

Using Americana Decor Creme Wax and a dry lint-free cloth,
I went over the entire table with the wax.

After it thoroughly dried (allow about an hour), I buffed the table, creating a soft shine.
This also protects the surfaces from daily use.

The last detail was to add sliders at the bottom of the four legs to prevent scratches on a wood floor and to easily glide over carpets.

I found these Adhesive Spike and Stick Sliders at Home Depot that were easily hammered in place.
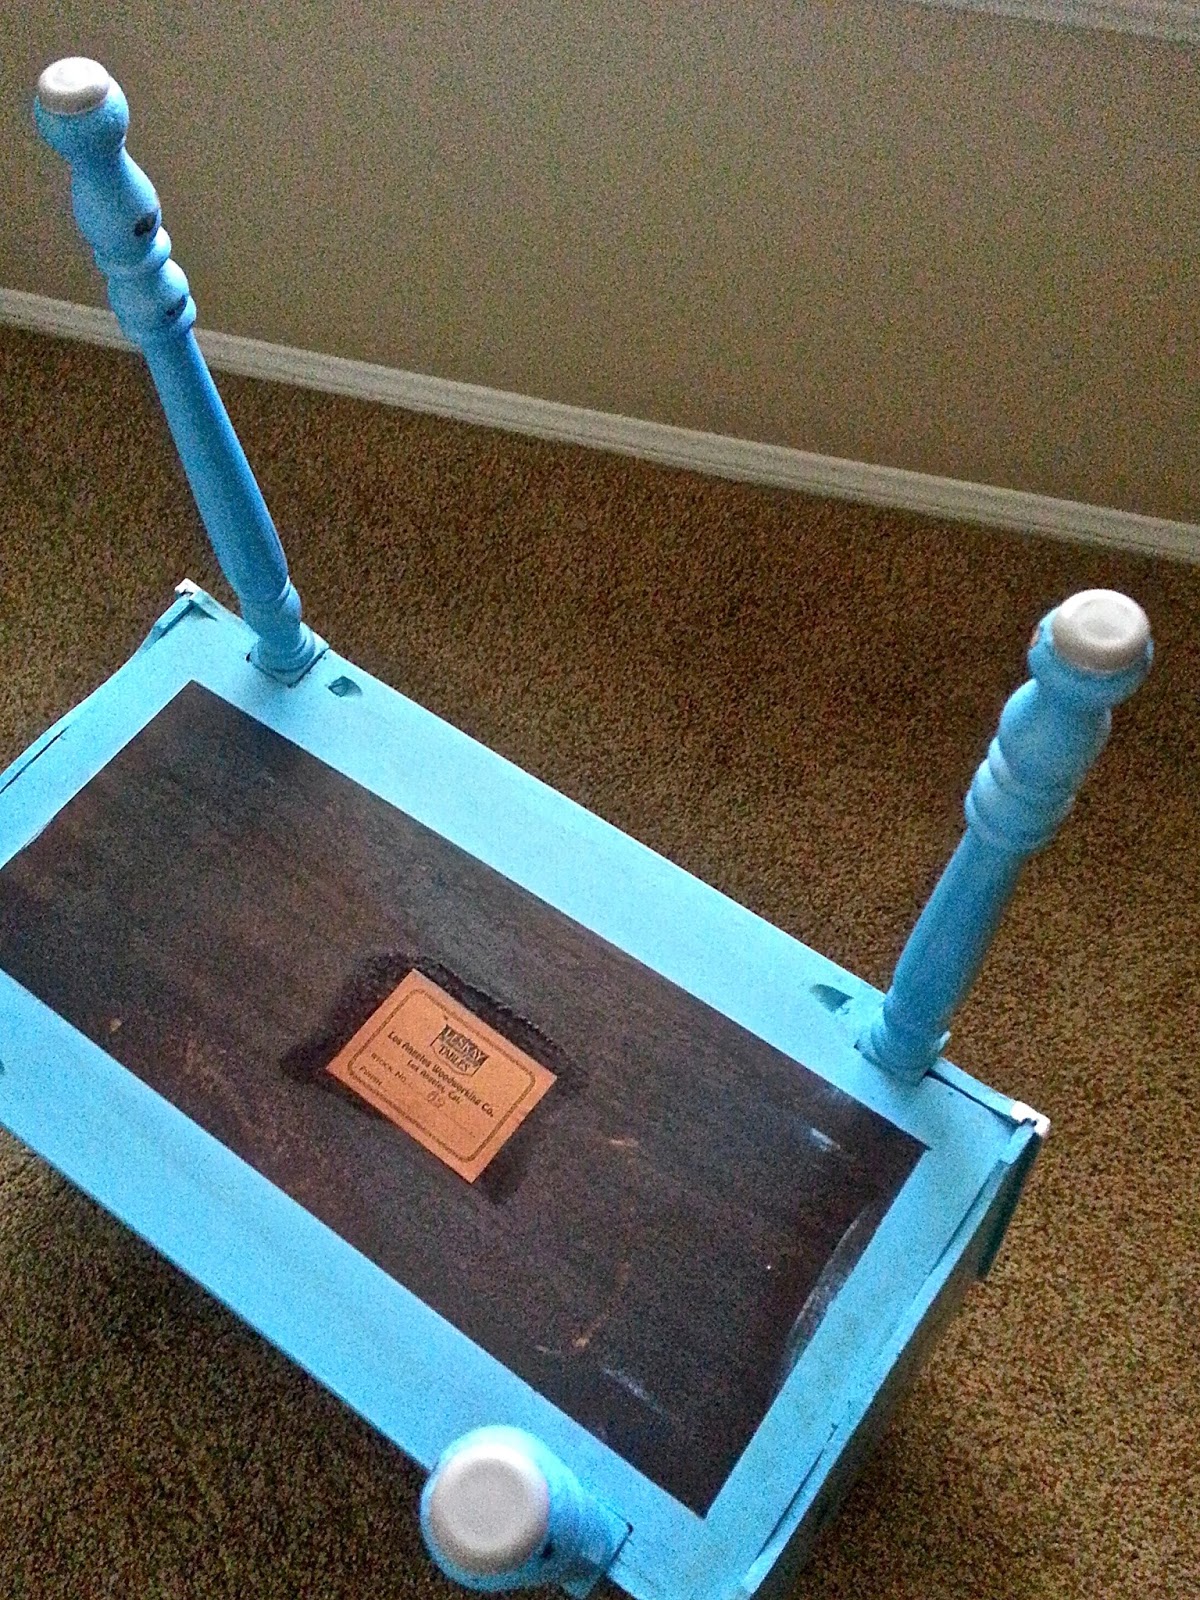
The original sticker on the bottom of the table shows that it was manufactured by the
Los Angeles Woodworking Company and made in the USA, probably in the 1930-40's.

Here is the completed magazine side table.


As nice as the magazine side table looks beside the pool, it actually found its new home in our daughter's bedroom, which already has a beachy theme. Magazines are now easily accessible while lounging in bed, and the table is just the right size for a cup of tea and/or fresh flowers.
Our scottie dog, Coconut, approves!

I already have big plans for my next furniture transformation using
Have you tried this amazing paint yet?
Disclosure: I received product and compensation from DecoArt towards the transformation of this project. However, all ideas and opinions are completely my own.
You might like these painted projects:
You might like these painted projects:
 |
| Framed in Chicken Wire & Burlap |
 |
| Nightstand from Blah to Beauty-ful |
***
Sharing at these fun sites:
A new linky party:
Adirondack Girl at Heart
Patina Paradise
The Painted Drawer
Diana Rambles Pin Me Linky Party (I've been Featured!)
Villabarnes
A Peek into my Paradise
Finding Silver Pennies
Polka Dot Poplars
The Answer is Chocolate
Artsy Fartsy Mama
The Cottage Market
French Country Cottage
Adventures of Mel Inspire Me Wed.
Stacey Embracing Change
Moonlight Mason Jars Linky Party
Wake UP Wednesday
The Crafty Blog Stalker
Crafty Allie
The 36th Avenue
VMG 206 Brag About It
Elizabeth & Co.
Purfylle
Art is Beauty
Optimistic Mommy Best of the Blogosphere
Merry About Town Monday Funday
Domestically Speaking
Life with Lorelai
Dear Creatives
It's Overflowing
Intelligent Domestications
I Should Be Mopping the Floor Inspiration Monday
Funky Junk Interiors
French Country Cottage
Coastal Charm
Diana Rambles
Common Ground
Summer Scraps
Miss Mustard Seed FFF
What Erika Wears
Occasionally Crafty
Olives 'n' Okra
My Repurposed Life
Just Another Mom
From My Front Porch to Yours
my salvaged treasures
Organized 31
I Gotta Create


This is gorgeous! I love the new color.
ReplyDeleteLove the color you chose and the stencil is the perfect finishing touch. What a great transformation. Thanks so much for sharing at Vintage Inspiration Party.
ReplyDeleteThat looks great! The color is stunning and I love how it all came together. Thank you for linking up with The Happy Home Life :)
ReplyDeleteLove this makeover! Love it if you shared it on Worthwhile Wednesdays!
ReplyDelete~Allie www.craftyallieblog.com
That blue is just wonderful. I think the writing on top is the perfect touch.
ReplyDeleteI love how it turned out! Absolutely gorgeous! Thanks so much for taking the time to link up with us over at the #HomeMattersParty - we hope to see you again on Friday! Feel free to bring a friend :)
ReplyDeleteThis is gorgeous! Love that color of blue & I love how you distressed it and did the stenciling. Such a cute little piece.
ReplyDeleteI found you on the Best of the Blogosphere link up :)
Perfection! Love how your piece turned out!
ReplyDeleteThank you for sharing with us at Brag About It!
~Laurie
We loved your Post so much we featured it on this weeks Linky Party... http://mommayoungathome.com/linky-party/come-add-your-post-to-the-sunday-social-linky-party-67/ Thank you again for stopping by and sharing with is. It is gorgeous...
ReplyDeleteCongratulations! This recipe is featured over at Diana Rambles and has been pinned in the Featured at Diana Rambles board at Pinterest, Tweeted, and Shared on G+. Please grab a featured button off my button page or via the post guidelines graphic. Thanks for sharing this awesome idea!
ReplyDeleteThat is just awesome - I love how it turned out!
ReplyDeleteOkay totally amazing! Love it! such a great color. i have used Annie Sloan chalk paint, which I love, but I haven't tried this. Definitely going to need to, especially since you can find it more easily! Thanks so much for linking up with the Best of the Blogosphere link party
ReplyDeleteI had a table like that and now I wish I didn't give it away!
ReplyDeleteLooks great.
Linda
What a gorgeous makeover - love everything about it!
ReplyDeleteWhat an amazing transformation, Doreen! Love the colors you chose, and those stencils are two of my favorites :) Thanks for linking up with Vintage Charm.
ReplyDelete